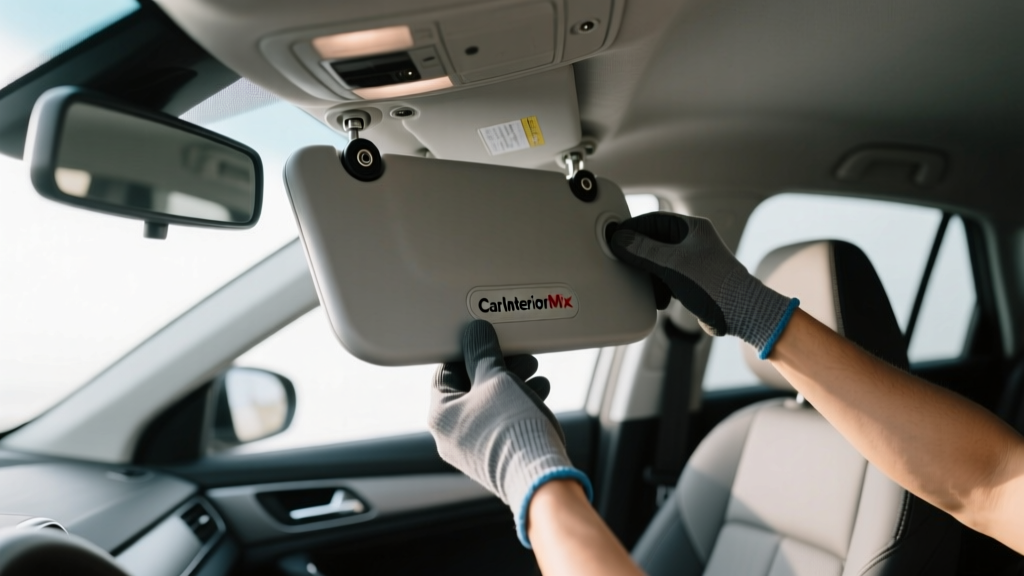
DIY Sun Visor Replacement: Car Interior Mix (2026)
A sagging, stained, or broken sun visor is one of those interior problems you notice every single drive?especially when the sun is low and you?re squinting at traffic lights. A visor that won?t stay up can also be distracting (and annoying) on the highway. The good news: in most vehicles, replacing a sun visor is a straightforward DIY job that takes 15?45 minutes, basic hand tools, and a little patience.
This guide walks you through a practical, real-world sun visor replacement?from figuring out what type you have (standard, illuminated, or integrated vanity mirror) to avoiding the most common ?why won?t this fit?? mistakes. If you?re trying to restore a clean cabin look, fix a floppy hinge, or replace a visor after an airbag-related recall repair, you?re in the right place.
Better still, a proper replacement can make the interior feel newer, improve driving comfort, and keep you from rigging up temporary fixes like binder clips or Velcro straps. Let?s get your visor back to factory-like function.
How to Know You Need a Sun Visor Replacement
Some visor issues can be repaired (like tightening a loose mount), but many problems point to a full replacement. Common signs include:
- Visor won?t stay up and droops into your line of sight.
- Broken pivot/hinge at the mounting bracket.
- Cracked or stripped mounting screw holes inside the headliner area.
- Vanity mirror cover broken or mirror falling out.
- Visor fabric separating, foam collapsing, or staining that won?t clean out.
- Illuminated visor lights don?t work (after confirming fuse/bulb isn?t the culprit).
Before You Buy: Identify the Right Sun Visor
Sun visors look similar across trims, but small differences can prevent a proper fit. Take 5 minutes to confirm these details first.
1) Driver vs. Passenger Side
Most vehicles use different visors on each side due to mirror size, wiring, or mounting angle. Confirm:
- Left (driver) vs. right (passenger)
- Color and material (cloth, vinyl, leatherette)
2) Standard vs. Illuminated (Wired) Visors
If your visor has vanity lights, there will be a wiring connector hidden under a small trim cover or tucked into the headliner. A non-illuminated visor usually has only screws and no harness.
3) Mount Style: Hook Clip vs. Slide Rod vs. Integrated Pivot
Many visors use a pivot bracket on one end and a ?retainer clip? or hook on the other. Others slide onto a rod or use a different latch design. Compare your original visor to the listing photos before ordering.
4) Part Number and Trim Compatibility
For the cleanest match, use your VIN with a dealer parts site or trusted catalog. Aftermarket options can be excellent, but verify:
- Exact year/make/model
- Trim (base vs. premium often changes visor features)
- Interior color code when possible
Tools and Supplies You?ll Need
Most DIY sun visor replacement jobs require only a few basics. Gather these before you start:
- Phillips screwdriver and/or Torx drivers (T15/T20 are common)
- Trim removal tool or plastic pry tool
- Small flathead screwdriver (for releasing covers/clips)
- Magnetic parts tray (optional, but great for tiny screws)
- Flashlight or headlamp
- Dielectric grease (optional for electrical connectors)
- Painter?s tape (optional to protect headliner edges)
Safety note for illuminated visors
If your visor is wired, it?s smart to disconnect the negative battery terminal before unplugging anything. This reduces the chance of shorting a circuit or triggering a warning light, especially in vehicles with sensitive interior electronics.
Step-by-Step: DIY Sun Visor Replacement Tutorial
The exact steps vary slightly by vehicle, but the workflow below matches how most visors are installed. Read through once before turning a screw.
Step 1: Position the Visor for Access
- Open the visor down and rotate it toward the side window if it has that feature.
- Adjust the seat back to give yourself room to work.
- Use a flashlight to locate mounting screws and any plastic covers.
Tip: If your headliner is delicate or older, place painter?s tape around the bracket area to prevent scuffs.
Step 2: Remove the Plastic Screw Cover (If Equipped)
- Look for a small hinge cap or cover at the visor?s pivot bracket.
- Use a plastic trim tool or a small flathead to gently pry the cover open.
- Set the cover aside where it won?t get stepped on.
Real-world example: Many late-model vehicles hide Torx screws under a flip-up cap. If you force the visor without opening the cap, the cap tabs can snap and you?ll be chasing a rattle later.
Step 3: Remove the Mounting Screws
- Support the visor with one hand so it doesn?t drop and tug the headliner.
- Remove the screws from the pivot bracket (usually 2?3 screws).
- Place screws in a tray in the order removed.
Tip: Press the screwdriver firmly into the screw head. Many visor screws are soft metal and strip easily.
Step 4: Release the Retainer Clip or Hook (Opposite End)
- Find the clip that holds the free end of the visor near the center of the car.
- It may have a small cover hiding one screw?remove it if needed.
- Unscrew the clip or gently pry it free depending on design.
If your clip feels stuck, stop and look for a hidden screw. Forcing it can tear the headliner backing.
Step 5: Disconnect the Electrical Connector (Illuminated Visors)
- Lower the visor slightly and look for the wiring harness near the pivot mount.
- Carefully pull the connector out of the headliner opening?don?t yank the wires.
- Press the connector tab and unplug it.
Practical tip: If the connector won?t release, use a small pick tool to gently lift the locking tab. Avoid pulling on the wires themselves?broken wiring inside the headliner is a pain to repair.
Step 6: Compare the Old and New Visors
Before installing, do a quick side-by-side check:
- Mount holes line up
- Same shape and length
- Same connector type (if illuminated)
- Same retainer clip style
This is the moment that saves you from discovering a mismatch after you?ve half-installed everything.
Step 7: Install the New Visor
- If illuminated, plug in the connector first. A small dab of dielectric grease can help prevent corrosion in humid climates.
- Position the pivot bracket and start screws by hand to avoid cross-threading.
- Tighten screws snugly, but don?t over-torque?stripping the headliner mount is a common DIY headache.
- Reinstall the retainer clip/hook on the opposite end.
- Snap the plastic covers back into place.
Step 8: Function Check
- Flip visor up/down: it should hold position without drifting.
- Rotate to the side window: it should move smoothly and latch correctly.
- Check mirror cover and vanity light (if equipped).
- Confirm no headliner gaps or trim pieces left loose.
Product Recommendations: OEM vs. Aftermarket vs. Used
There?s no one ?best? choice?your decision depends on budget, interior condition, and how long you plan to keep the vehicle.
OEM (Original Equipment) Sun Visors
- Best for: Perfect color match, factory texture, and exact fit.
- Pros: Usually highest quality; correct wiring/connector; predictable installation.
- Cons: Higher price; some older models may be discontinued.
Aftermarket Replacement Sun Visors
- Best for: Budget-friendly repairs on daily drivers.
- Pros: Often significantly cheaper; widely available online.
- Cons: Color can be slightly off (especially ?gray? interiors); hinge tension may feel different; illuminated versions can have connector mismatches.
Buying tip: Look for listings that specify trim level and show the connector end clearly. Reviews mentioning ?direct fit? and ?no wiring modification? are a good sign.
Used/Salvage Yard Sun Visors
- Best for: Discontinued parts or rare interior colors.
- Pros: Affordable OEM parts; correct fit and connector type.
- Cons: May already have worn hinges or hidden stains; foam can degrade with age.
Real-world example: If your original visor failed because the internal hinge wore out, a used visor from a high-mileage donor car might fail again sooner than you?d like. Ask about mileage when possible.
Common Mistakes to Avoid
- Skipping the side-by-side comparison: Even one different mounting hole pattern can waste an afternoon.
- Over-tightening screws: Stripped headliner mounting points can require inserts, oversized screws, or bracket repair.
- Pulling on wiring: Always release connectors by the tab; damaged harnesses can cause intermittent vanity light issues.
- Breaking the plastic covers: Pry gently at the correct seam?covers can be brittle in cold weather.
- Ignoring the retainer clip: A worn or cracked clip can make a new visor feel ?loose.? Replace the clip if it doesn?t hold firmly.
- Not disconnecting the battery (when needed): For illuminated visors or vehicles with advanced electronics, this can prevent electrical surprises.
Troubleshooting After Installation
The visor still won?t stay up
- Confirm the new visor isn?t defective (rare, but possible).
- Make sure the pivot screws are snug and seated properly.
- Check that the visor isn?t binding against the headliner or A-pillar trim.
The vanity light doesn?t work
- Confirm the connector is fully seated.
- Check the fuse (some vehicles have a dedicated ?interior lights? circuit).
- Verify the mirror cover actuates the switch (common on some designs).
Rattle or buzzing near the visor
- A screw cover may not be snapped in fully.
- The retainer clip could be loose or cracked.
- A wire harness may be tapping inside the headliner?reposition gently.
FAQ: Sun Visor Replacement
How long does it take to replace a sun visor?
Most vehicles take 15?45 minutes. If yours has an illuminated visor with a tucked harness, plan on the longer end?mainly to avoid damaging the headliner while accessing the connector.
Do I need to remove the headliner to replace the visor?
Usually, no. The wiring connector (if equipped) is typically accessible through the visor mounting opening. Only in unusual cases?like a previous repair that buried the connector?would headliner removal be needed.
Can I upgrade to an illuminated visor if my car didn?t come with one?
Sometimes, but it?s rarely plug-and-play. You may need additional wiring, a different harness, and possibly a different body control module configuration. For most owners, sticking with the factory feature set is the simplest route.
Why are my visor screws spinning but not tightening?
This often means the mounting point is stripped. Solutions include:
- Using a slightly larger screw (only if it won?t damage surrounding material)
- Installing a thread insert or clip nut (best approach if space allows)
- Replacing the bracket mount if it?s a separate part
What if the new visor color doesn?t match my interior?
Color mismatch is common with aftermarket parts, especially ?tan,? ?gray,? and ?beige? interiors. If the mismatch bugs you, consider an OEM visor in the correct color code or sourcing a clean used visor from the same trim level.
Is it worth repairing a sun visor instead of replacing it?
If the issue is a loose screw or a broken retainer clip, repair makes sense. If the hinge tension is gone or the internal pivot is broken, replacement is usually more reliable than trying to rebuild the visor.
Wrap-Up: Your Next Steps
Start by identifying your visor type (standard vs. illuminated), confirm the correct side and mount style, then choose the best replacement option?OEM for perfect match, quality aftermarket for value, or used OEM for discontinued parts. Once you have the right visor, take your time with the covers and connectors, avoid over-tightening, and do a full function check before calling it done.
If you want to keep refreshing your cabin, explore more practical interior DIY guides and product picks on carinteriormix.com.